There are a lot of ways you can customize and edit your data, both visually and organizationally.
Waypoints, Routes, Regions, and Tracks all have a tab called “Properties”. This is where you will find the majority of the settings and functions for each piece of data. Waypoints also have a tab called “Icon”, where you can customize the icon the Waypoint displays.
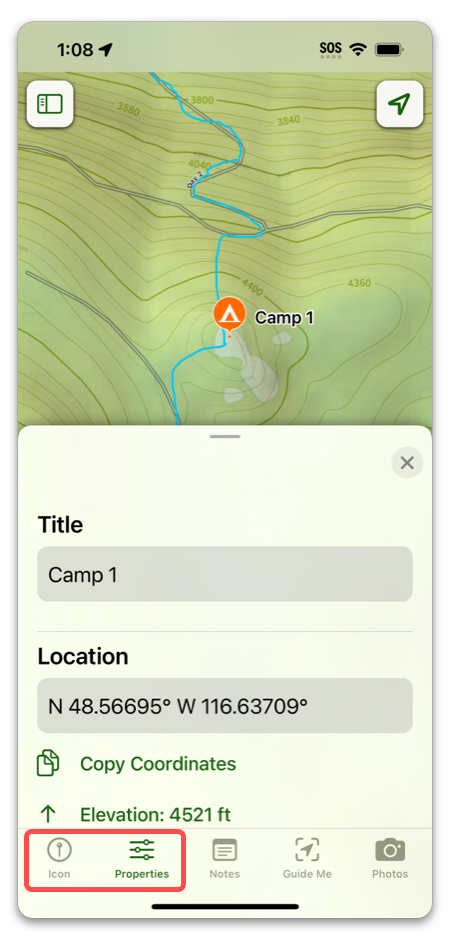
Waypoints:
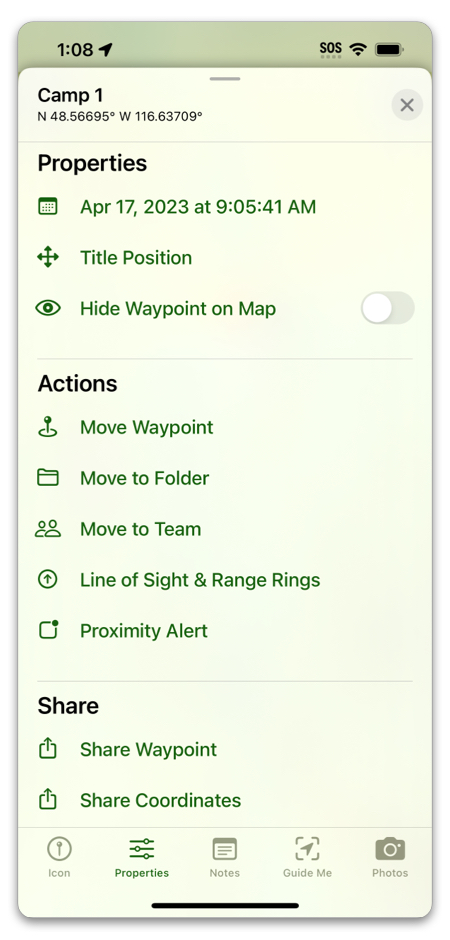
Date: This displays the date the data was created. Tapping it will copy it to your clipboard.
Title Position: This lets you move the location of the title displayed on the map.
Hide Waypoint on Map: Toggling this on will remove the Waypoint from your map. It will appear again after you navigate to the data folder it is located in and select it.
Move Waypoint: Moves the Waypoint to a new coordinate.
Move to Folder: Moves the Waypoint into a data Folder. This lets you organize data beyond simply “My Waypoints”.
Move to Team: Moves the Waypoint out of “My Waypoints” into a Team you select. It will be part of that Team’s data and will no longer be a part of your private data.
Line of Sight & Range Rings: See Line of Sight.
Proximity Alert: See Proximity Alerts.
Share Waypoint: Creates a Share Link for the Waypoint that will open in a webpage.
Share Coordinates: Shares the raw coordinates tied to the Waypoint.
Export Waypoint: Exports the Waypoint as a data file.
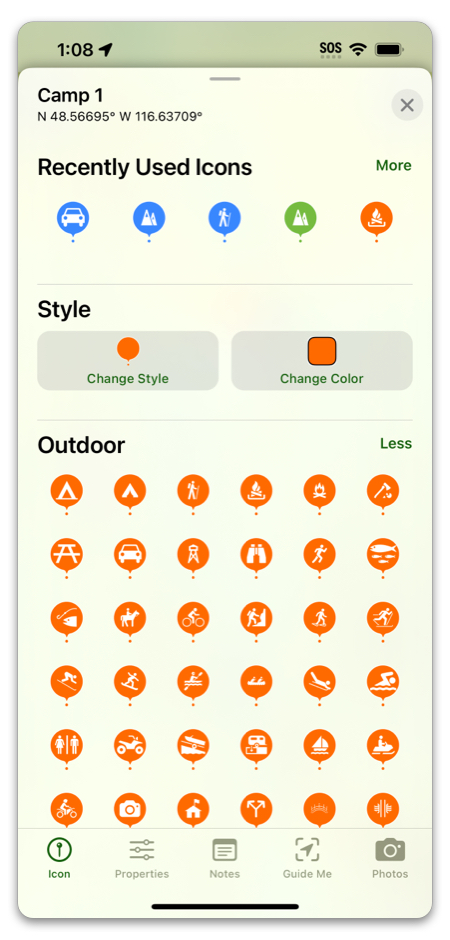
The “Icon” tab lets you change the image, style, and color of the Waypoint:
Routes:
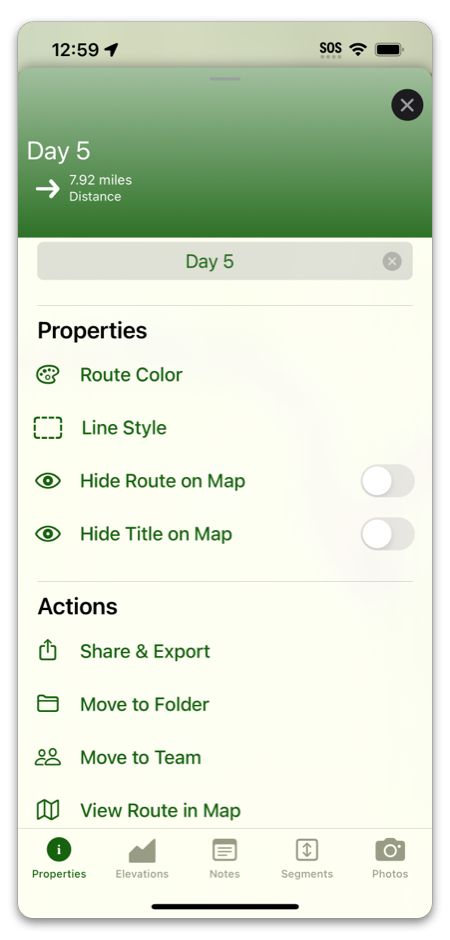
Route Color: Changes the color of the Route as displayed on the map.
Line Style: Make your Route thicker, thinner, dotted, dashed, etc.
Hide Route on Map: Removes the Route from view on the map until you navigate to the folder where it is located and select it manually.
Hide Title on Map: Hides the title from view when displayed on the map.
Share & Export: Opens sharing and exporting options.
Move to Folder: Moves the Route into a data Folder. This lets you organize data beyond simply “My Routes”.
Move to Team: Moves the Route out of “My Routes” into a Team you select. It will be part of that Team’s data and will no longer be a part of your private data.
View Route in Map: Navigates to where the Route is located on the map.
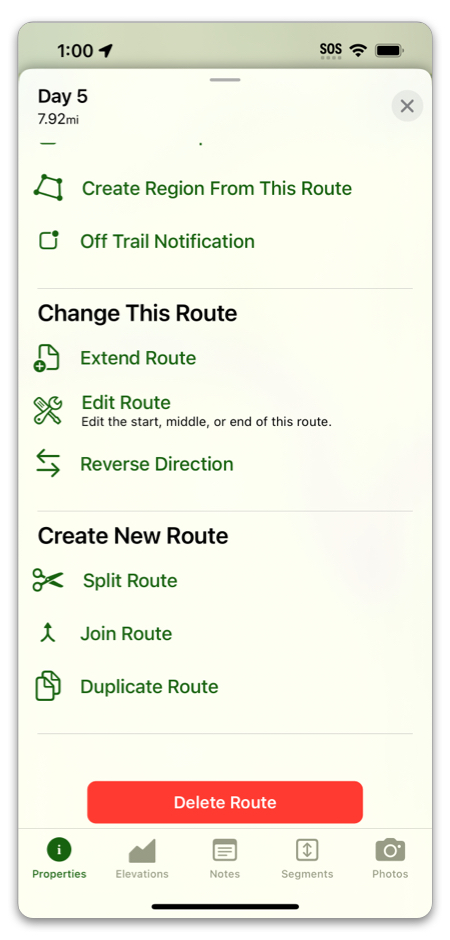
Download Map for Route: Navigates to the Download menu and automatically selects all necessary map tiles.
Create Region from this Route: Creates a Region using a line between the beginning and end of the Route as a boundary line, and the actual Route as the rest.
Off Trail Notification: A Proximity Alert that notifies you when you are a certain distance away from the Route.
Extend Route: Allows you to add on to the end of the Route.
Edit Route: Edits the Route.
Reverse Direction: For the purpose of Progress on Trail, flips the trail around so that the Trailhead is the destination.
Split Route: Splits the Route at a point you select, creating two Routes out of the one.
Join Route: Allows you to fuse the Route with another existing Route.
Duplicate Route: Creates an identical copy of the Route. If it is a Track, the copy will be a Route.
Regions:
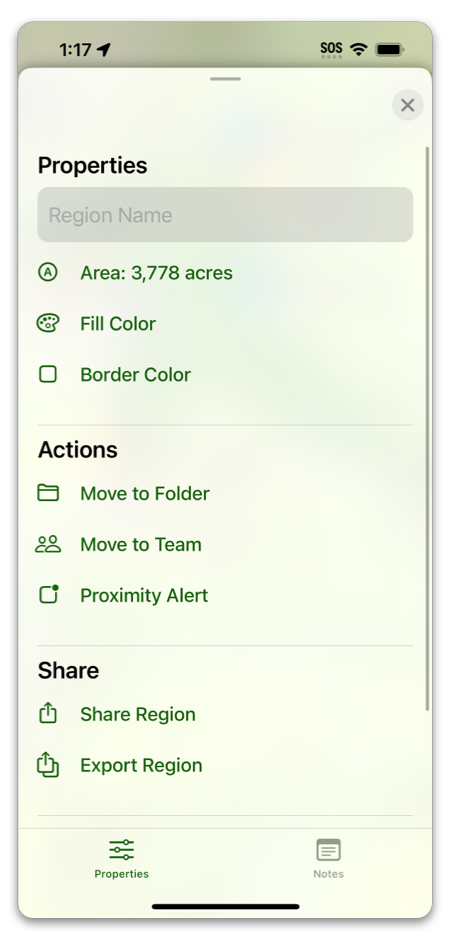
Area: The total area of the inside of the Region. Tapping this will copy the amount to your clipboard.
Fill Color: Changes the inside color of the Region.
Border Color: Changes the border color of the Region.
Move to Folder: Moves the Region into a data Folder. This lets you organize data beyond simply “My Regions”.
Move to Team: Moves the Region out of “My Regions” into a Team you select. It will be part of that Team’s data and will no longer be a part of your private data.
Proximity Alert: Sets a notification upon entering or exiting the Region.
Share Region: Creates a Share Link for the Region which will open an interactive webpage.
Export Region: Exports the Region as a data file.