Welcome to Topo Maps+ for the iPad! Haven’t downloaded the app yet? Click here!
To get started, here is an overview of the buttons displayed on the main screen of the app:
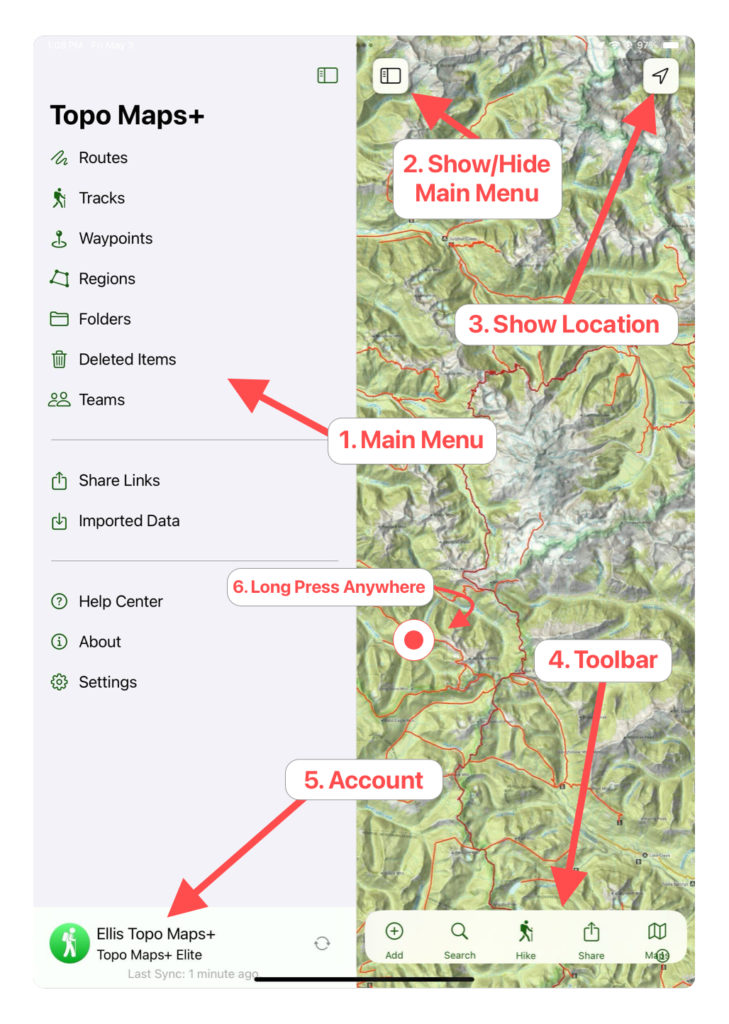
- Main Menu: This is where you can view your saved Routes, Tracks, Waypoints, Regions, Folders, and any Teams you are a part of. You can also access the Help Center from here and change your settings.
- Show/Hide Main Menu: Tap this to show or hide the main menu.
- Mark My Location: Note: In order to mark your location, Topo Maps+ needs permission to view your location. There is a prompt when you first try to view your location, or you can go into your iPhone settings (gray gear icon) and scroll down to the Topo Maps+ entry to do this.
- Tap once to center on your location.
- Tap it again to orientate the map based on the compass.
- Tap a 3rd time to hide your location dot.
- Toolbar: Access map functions here:
- “Add“: Tap this button to add a Route, Waypoint, or Region.
- “Search“: Tap this button to perform searches.
- “Hike” (On-Trail Tools): Tap this button to access tools for the trail.
- “Share“: Tap this button to Share, Print, and Export.
- “Maps” (Map tools and overlays): Tap this button to view the map menu. (Want to learn more about map options? Here are two articles to help: Preset Map Dashboard and Advanced Map Dashboard)
- Account: Tap this button to view your account information. Tap the revolving arrow icon to sync your data.
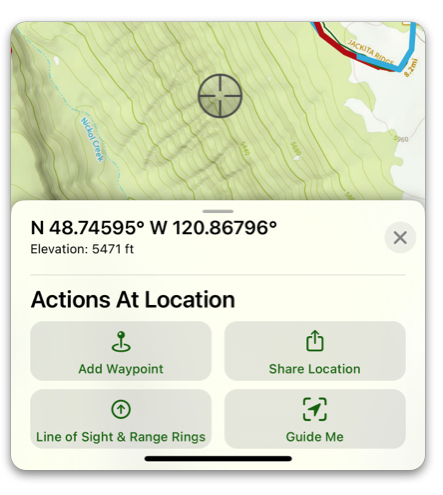
- Long Press Anywhere: Holding down anywhere on the screen will bring up this menu, where you can add a waypoint, share your location, use the Line of Sight tool, the Guide Me tool, as well as view your coordinates and elevation.
Why the iPad app?
Topo Maps+ for the iPad is a good option if you want a bigger screen than a phone, but don’t have a Mac or are more comfortable with touch screen and gestures.
If you have an external keyboard for your iPad, you can use keyboard shortcuts just like on a Mac!